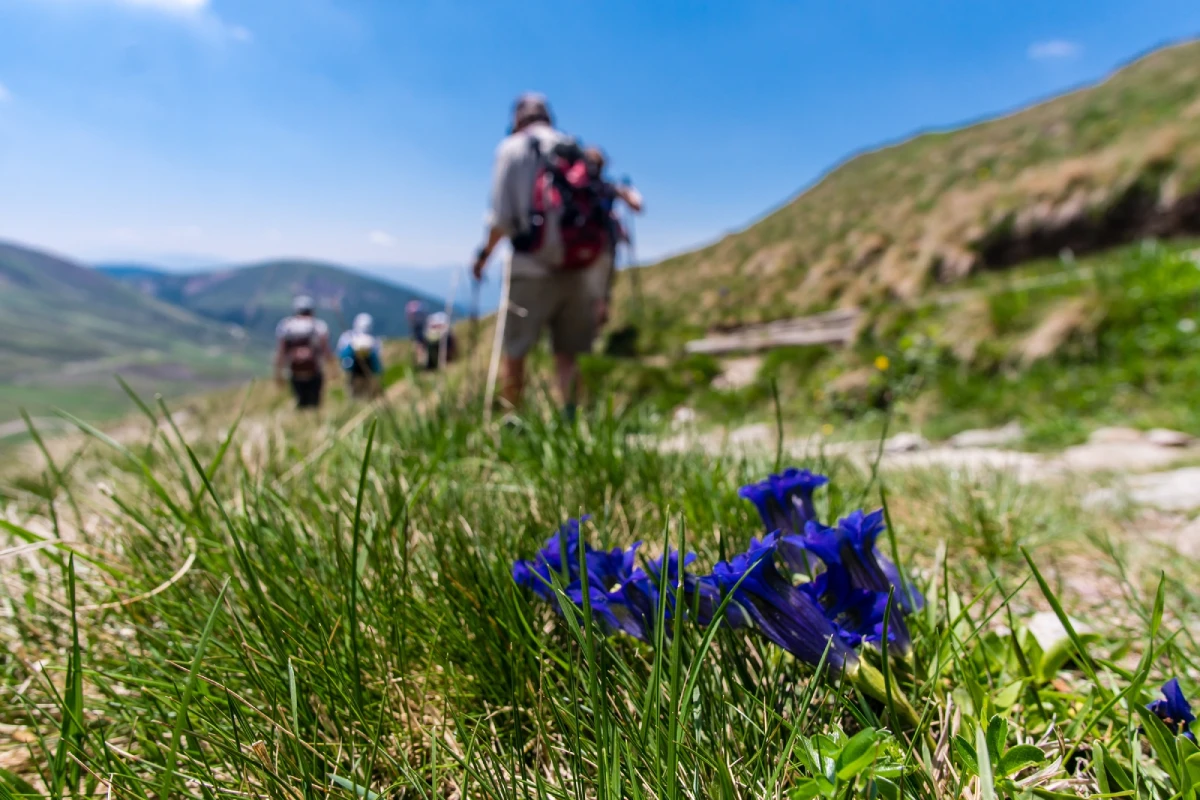
Why Hike In Spring?
Most people think of summer as the best hiking season, but spring hiking has some awesome benefits too. Smart hikers take advantage of this time of year to prepare for the upcoming hiking season. As well as to help shake off the winter blues while enjoying the lack of crowds & cool temperatures. Another advantage is, that hikers see beautiful spring wildflowers, no bugs and spectacular views. To help you choose where to go I wanted to share my picks for the best spring hikes in America.
Discover the best spring hikes through Maine to California and Utah to Texas.
In each State, everyone from novices to experts can discover great hiking adventures. If you want to skip to a specific locale, use the navigable table of contents. Now without further ado, let’s get started.
California: Point Reyes National Seashore
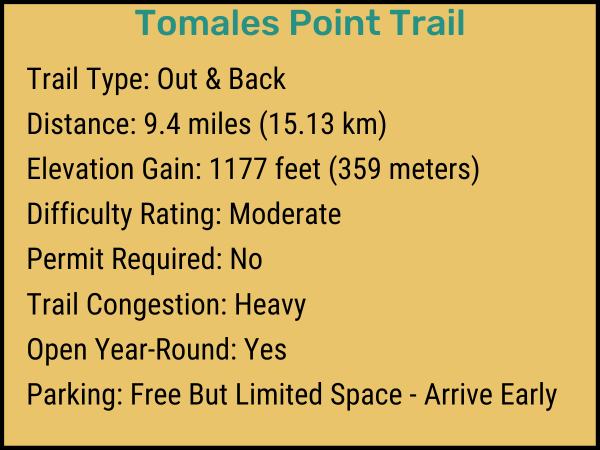
Tomales Point Trail
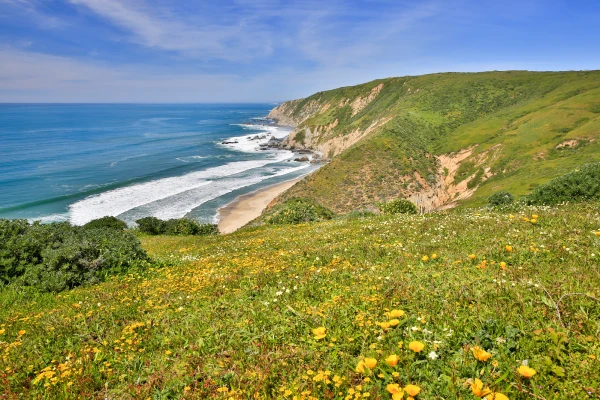
For hikers who want awe-inspiring ocean views, this is the “Tomales Point Trail” in the Point Reyes National Seashore. Located 2 hours Northwest of San Francisco, California. This is a popular 9.4 miles (15.13 km) length, in and out hike spans a ridge line towards the northernmost tip of the Pt. Reyes. Dividing Tomales Bay from the Pacific Ocean and terminating at Point Reyes.
Hikers flock to this trail year-round for the best spring hikes and views of the Pacific coastline down into Tomales Bay. Being a former ranch road hikers pass through scrub and grasses. Unlike a hard hike like the John Muir Trail In the Sierra National Forrest. This trail is best for families because it’s more like a long walk than an uphill hike. You only have to travel over small undulating slopes. It’s best to hit this moderate trail during the Spring.
Expect to witness elephant seals on the shores below during March. Wildflowers (like poppies, iris and lupine) are blooming from April through June. The big wildlife attraction on this trail is the herd of tule elk as this area has an elk preserve. Other wildlife you may see are raccoons, rabbits, birds and non-venomous snakes.
Parking at the trailhead is free but fills up fast, particularly in the afternoon. In the event you have to park along Pierce Point Road ensure that no part of your vehicle is on the pavement. Keep in mind, that the shoulders of this road get muddy in Spring.
- Pros: Breathtaking Pacific Ocean views. Wildlife viewing. Child-friendly. No fees.
- Cons: Dogs aren’t allowed. Full wind and sun exposure. No water is available. Lack of food or fuel services within 16 miles (25.75 km) of the park.
Trailhead Directions
Expect the trip to take one hour and thirty-five minutes for the drive (3 hours round-trip). This is the amount of time from the Santa Rosa area, northwest of San Francisco, California. The location of trailhead is at the northernmost end of the Point Reyes peninsula.
These are the directions from the Bear Valley Visitor Center, the main visitors center for the park. Start by driving Northwest for 2 miles (3.22 kilometers) on Bear Valley Road. Next turn left on Sir Francis Drake Boulevard. Travel for another 5.6 miles (9.01 km) and then turn right at the Y signed for “Tomales Bay State Park” and “Pierce Point Ranch.” Follow Pierce Point Road for 9 miles (14.48 km) to the parking lot at Pierce Point Ranch. This is also the Tomales Point Trailhead.
Ensure to consider the types of roads inside the Point Reyes National Seashore area. The roads are windy and slow-going, so allow thirty-five minutes to drive the 16.6 miles (26.72 km). Many visitors spend at least 3 to 4 hours trekking the Tomales Point Trail.
What To Expect On This Californian Hike
At the western edge of the parking lot is the sign to start the Tomales Point Trail. Start walking this wide trail as it sweeps past one of the ranch buildings. It will then turn right and navigate to the North where cypress trees give way to a sparse mix of vegetation. Including yellowish bush lupine, coyote brush, and even wild radish. Pay attention to where you step as coyote scat is common.
After about 1 mile (1.61 km) at a level elevation, the path curves to the right and descends into Windy Gap. This is a common location to start seeing the elk. Next, you begin a moderate ascent, finally arriving at the ridge line.
On this wind-swept ridge line the vegetation hugs close to the ground. Watch for rock formations with some poking through the hard dirt trail surface. Anyways, after continuing for 3.2 miles (5.15 km) you’ll reach old Lower Pierce Point Ranch. All that remains is a cluster of cypress and eucalyptus trees.
At 3.8 miles (6.12 km), there is a sign pointing north to Tomales Point, where the trail turns into loose sand. It begins as a slog uphill but does level out after a while.
At the 4.4 miles (7.08 km) mark, you’ll reach the turnaround, an unmarked sandy bare spot. Past this point, steep bluffs drop straight to the sea. There is a path downhill to the tip of the point, but it’s best for sure-footed hikers only. Bluffs along the California coast are unstable. They tend to crumble and slide, especially in wet weather. Instead, groups with kids should stop and retrace their way back to the trailhead.
Preparation Is Key
- Map: Take a topographic map with you, as this trail is confusing. Going off-route can lead to deadly consequences. Click to download a Tomales Point Map.
- Check The Weather: Morning brings fog to this area, plus the entire hike is in an exposed area. Expect varied weather and temperatures since you are near water. For accurate weather check the National Weather Service forecast for Tomales Point.
- Fill Up Your Car: Due to the remote location of this hike, it’s best to fuel up before entering the park. The nearest fuel station is 16 miles (25.75 km) away in Point Reyes Station.
- Bring Hydration: There aren’t any natural potable water sources on this hiking trail. In a pinch, there is a water bottle filling station inside the Bear Valley Visitors Center.
- Nutrition: Like water, there isn’t food available in the park. The closest food services are in Inverness, which is a 25-minute drive from the trailhead parking lot.
- Proper Footwear: Visitors and locals love to wear flip-flops in California. But don’t wear them for this hike, obstacles on the trail lead to sprained ankles. Wear supportive runners or better yet trail specific running shoes or boots.
- Layered Clothing: The best way to combat stiff winds, cool temps, fog or rain is layering. A light rain shell should suffice in the Spring and Summer months. Also bring sun protection, including sunscreen, a hat and sunglasses.
Cell phone: Reception is minimal to nonexistent but have one and set to airplane mode to save the battery. In an emergency, your cell should allow a 911 call if you get reception. There’s a pay phone at the Tomales Point Trailhead parking lot.
Utah: Canyonlands National Park
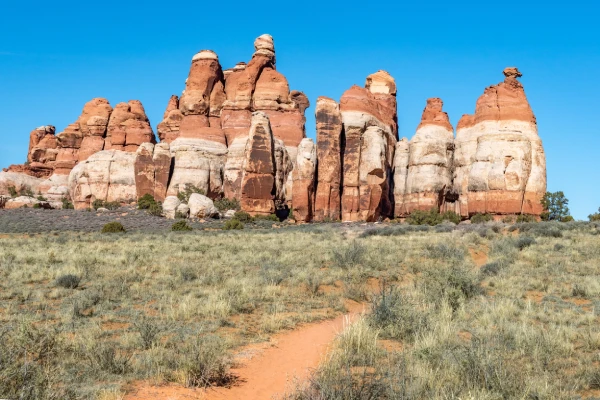
Chesler Park Loop Trail
The Chesler Park Loop Trail is one of my favorite hikes in Canyonlands National Park. This hike is the crown jewel in the Needles section of the park. At about 11 miles (17.7 km), it’s one of the best spring hikes in America for slot canyons and sandstone formations. Expect a diverse day hike of scrambling up and down towering Mars-like rock surfaces.
Anyone visiting Canyonlands National Park needs to pay a day fee or better yet, get a National Park Pass. Check the NPS.gov website for the latest park entrance fees. It’s a cost-saver for people who plan on going to more than three National Parks a year.
- Pros: Unique rock/slab formations. Slot canyons. Backcountry camping is available.
- Cons: Dry heat mid-day. No water sources available or cell service. Lacks official trail markers, and uses cairns (man-made stone mounds) instead.
Getting To The Trail
This hiking trail is about a 1.5-hour drive from the city of Moab inside a Utah national park. While this is a long drive the scenery between the North and South sections of the park is worth the extra effort. On your journey make a pit stop at Newspaper Rock, a large collection of petroglyphs.
At the South entrance of Canyonlands Park follow to the Needles District Campground. Just before the campsite, bear right onto the Elephant Hill access road. Finally, drive this dirt road for 2 miles (3.22 kilometers) to the trailhead.
Next, you will begin hiking for 1.5 miles (2.41 kilometers) from the trailhead to a trail junction. Make a right turn at this junction and start hiking westward. In 0.6 miles you will reach “Elephant Canyon” where you will see another trail junction. Turn left the junction to follow the Elephant Canyon/Druid Arch Trail southward.
What To Expect Hiking Chesler Loop Trail
You start climbing many well-marked slabs with little cairns along the way. In some sections these slabs a quite steep. Pay close attention to these cairns as you trek. Losing sight of them could place you in a confusing red maze of sandstone formations.
I should note that this hike does require some agility and fitness. You’ll get your hands on the rock to help hoist or steady yourself in sections. There is also sand in some sections that will slow your momentum.
Next, you will pass through a small slot canyon section and enter into the Needles district. In here, the views are out of this world, due to the twists and turns every hundred yards, undulating up and down. Depending on the time of day you begin hiking the shade in the Slot Canyon can be cold so dress in layers.
After about 2.5 miles (4.02 km), the trail changes to a steep climb up to a pass between two of these massive rock towers. Which then, drops hikers back down into Chesler Park.
At the bottom, the trail flattens out, crossing a meadow that sticks out as odd for the expected terrain. In this area, you will also see signage for backcountry campsites, that need a $30 overnight permit. A great option for hikers to break up the longer loop to enjoy the incredible sunrises and sunsets.
Merging With Joint Trail
Past the meadow, the trail winds through boulders to merge with the Joint Trail. This is a highlight section for many hikers who loved the earlier slot canyon. Here you get to squeeze through an underground shoulder-width slot. Inside expect to hear fellow trekkers practicing their echo skills.
Once you emerge from the slot, the Joint Trail makes a curve to the right. You will immediately notice the elevation climbs up out of a wider canyon. Trek on and loop back toward the pass to Chesler Park. From here, this section rejoins the initial trailhead section back to the parking lot.
What To Wear Hiking The Chesler Park Loop Trail?
These items are essential for not only your comfort but also your safety.
- 3-6 liters of water (more during summer)
- Salty, calorie-rich snacks plus a lunch
- A Backpack
- Trekking poles (great for hikers with joint pain issues)
- Hat (wide-brimmed for sun protection)
- Sunglasses
- Sunscreen
- Rain jacket
- Non-cotton layer (breathes in the heat and dries quickly if wet)
- The 10 essentials, I never hike without these items
Maine: Baxter State Park
Mount Katahdin’s Chimney Pond Trail
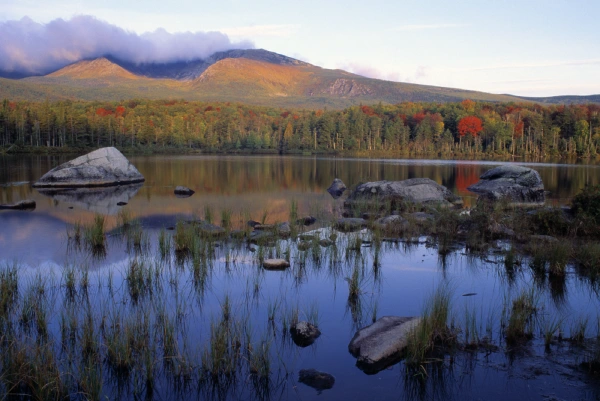
Mount Katahdin is the highest of the Maine mountains. It’s also the northern exit of the Appalachian Trail. For hikers not ready to make the full trek up Mount Katahdin but want great sights, try Chimney Pond Trail.
This is a rocky trail that takes you up to Chimney Pond where the views are breathtaking. At 6.28 miles (10.1 km) long this is a moderate out-and-back trail located near Millinocket, Maine. Sights include a glacial bowl with mountain ponds that ascend through a forest. At the top of the trail you see glimpses of the North basin of Mount Katahdin.
To visit Baxter State Park, if you are driving and don’t have Maine license plate expect to pay an entrance fee. Check the Baxter State Park Website for current park entrance fees.
- Pros: Spectacular views. Plenty of water sources. Camping available.
- Cons: Super rocky, beware people with weak ankles. Unexpected weather changes. Under the tree line, it gets dark early.
Direction To The Trail
The Chimney Pond Trail is about 50 minutes from Millinocket, Maine, USA. The Chimney Pond Trail is about 50 minutes drive from Millinocket, Maine, USA. Starting from Katahdin Road in the town of Millinocket, turn left on Bates Street. This street becomes Millinocket Road and into Baxter Road. Drive this road for 16 miles (25.75 km) to the Toque Pond gatehouse. This road is hard-packed gravel, so 2-wheel drive vehicles should be fine to get up to the campground in Spring.
Veer to the right after the gatehouse and continue to the Roaring Brook Campground. This is also the main parking lot for the trailhead. It’s crucial if you want to day-hike here to make a parking reservation. Not doing so means you won’t have much luck trying to hike. Once parked, follow the signs to the Chimney Pond trail.
Trail Sights: Chimney Pond Trail
The trail begins as a gentle climb and quickly passes the junction for the Helon Taylor trail. It continues along an old tote road next to Roaring Brook. The path is rocky and a bit beaten down but easy to traverse. Around 2 miles (3.22 kilometers) in, the trail passes the South shore of the Lower Basin Pond. As you trek on, you enter the horseshoe-shaped valley of the Great Basin, carved by an ancient glacier.
Still hiking west, you ascend past mossy boulders. On your right, you will pass the junction for the North Basin Cut-off Trail to Blueberry Knoll. To add to the confusion later there’s another junction for the N. Basin Trail to hook up with the Hamlin Ridge Trail. The elevation here is easy, and you will encounter many wooden footbridges and bog boards. This is due to the trail crossing a wetland area from creeks flowing down the mountain.
Next, you pass south of Dry Pond which might be wet in Spring or after a heavy rain. It’s after this viewpoint that you reach the second junction with the N. Basin Trail. Hikers can take this route north (right turn) to the Hamlin Ridge Trail. Instead, continue southwest for about a mile passing a bunkhouse. Just past it, within sight of Chimney Pond is the end of the trail. Take in the sights and have a snack or lunch. Then to finish one of the best spring hikes, make your way back down to the parking area.
Plan Your Hike: Chimney Pond Trail, Mount Katahdin
- Navigation: Take a good paper topographical map.
- Sun Protection: Hat, sunglasses, sunscreen.
- Insulation Extra layers are best for variable conditions. The top of this trail is open to exposure. It does not have the same weather as at the trailhead.
- Illumination: It’s a park rule, you must have a flashlight or headlamp for hiking.
- Nutrition: Take a lunch and extra snacks in case things go wrong.
- Hydration Bring at least 2 liters of water per person. There are natural water sources, but you need to treat water before drinking.
- First Aid Kit: A must for any adventure in the mountains.
- Fire Starter: Bring some Matches, a lighter, or flint and steel.
- Repair Kit: For your clothing and boots.
- Emergency Blanket: If you get in trouble, packing a space blanket will help you survive the night.
Virginia: Grayson Highlands State Park
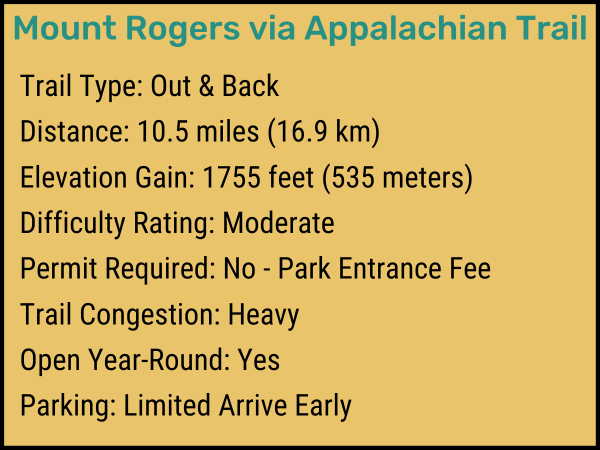
Mount Rogers via Appalachian Trail
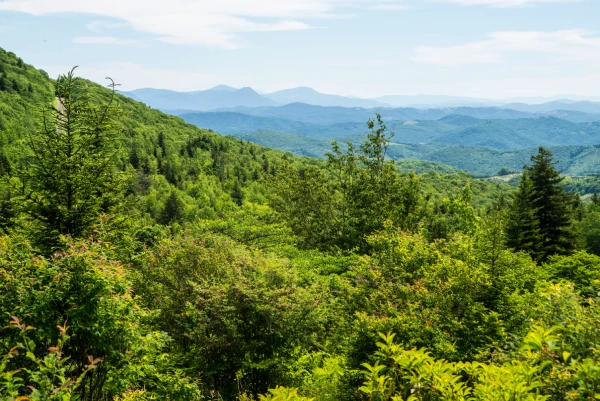
Mount Rogers via Appalachian Trail is one of the best day hikes in the Appalachian Range. Located in Grayson Highlands State Park between the towns of Damascus and Independence, Virginia. This out-and-back trail is 10.5 miles (16.9 km) in length, delivering breathtaking views throughout its length. Yet in an ironic twist there aren’t any summit views.
So why trek up to Mount Rogers? For the spectacular change in landscapes, that’s why. Featuring large rock formations, wildflowers and spruce-fir forests. Plus if you’re lucky, herds of wild, free-ranging ponies.
For visitors, driving into and parking in Grayson Highlands State Park, expect to pay a fee. Check the Virginia State Parks Website for current park entrance fees. Also, the Massy Gap Parking lot (trailhead) costs around $3.
- Pros: Pets allowed. Easy elevation for kids. Sweeping views. Interesting landscapes. Wild ponies and other wildlife watching. Backcountry camping is available.
- Con’s: Very busy trail on weekends. Open exposure equals wind and no shade. Lack of natural water sources. Not a classic hike up to summit views.
Directions To Trailhead
The shortest route is from the town of Independence, Virginia at about 40 minutes. Start by heading West on US-58 W/E Main St toward State Route T 1137, driving for 16.7 miles (26.88 km). To add to the confusion, the highway changes names three times in the span of the trip. From West Main Street to Wilson Highway and then Troutdale Highway.
Once you approach Volney, turn West (left) to stay on US-58 W, here it’s called Highlands Parkway. Drive for 7.7 miles (12.39 km) and then turn North (right) onto VA-362 N or Grayson Highland Lane. Follow through the park’s gate and drive up for 3.5 miles (5.63 kilometers). On the drive up you will pass the Sugarland Overlook and then the backpacker’s parking lot. Finally, the Massy Gap parking lot is on your right side along the road.
Trekking Up Mount Rogers
To get up to the summit from the Massie Gap parking lot, there are many trails to reach it. This is the direction I’ve done it, start up the Rhododendron Trail. At first, the trail leads you over a wide-open grassy meadow, then turns into an old wagon road across a hillside. After a half mile, you will come to the junction for Appalachian Trail (AT) Northbound.
Turn left at the junction and follow the AT North up to the rugged and rocky outcroppings of Wilburn Ridge. Next, you will trek your way up to and through Rhododendron Gap.
Often it’s in this section I see the famous herds of wild ponies, but they wander all over the mountain. Unlike most wild horses, these wild ponies are of Shetland pony descent. They help to control the spread of native hawthorns, thorny shrubs and trees.
Another beautiful feature of this area is its full of rhododendron thickets. Which deliver vivid colors when they bloom during May and June. Continue hiking past Rhododendron Gap for about 1.5 miles (2.41 kilometers) to the short spur trail.
This is the trail which leads to the summit, located a little distance past the Thomas Knob Shelter. I love this section of trail because it reminds me of the Pacific Northwest of the country. Due to the fact, you finally hit the tree-line section of the hiking trail.
Unlike many peaks in the USA, a forest of thick spruce-fir trees covers the 5729-foot summit of Mount Rogers. Which means you won’t have any vista views there, but you’ll hike amongst lush and green trees.
Descend via the Appalachian Trail Southbound straight to the parking lot. I like this route as it shaves off some time back down.
Preparation Tips: Mount Rogers, Grayson State Park
* Before attempting the hike check for an up-to-date weather forecast. In Spring and Fall, the air temperature will fluctuate from the base to the summit by almost 15 degrees. To get as specific weather updates as possible, I use the National Weather Service.
Gear List:
- Sturdy hiking boots: Throughout the trail, there are tons of rocks and roots. Wearing improper footwear can lead to turning an ankle up here.
- Water/Hydration: For a hike of this length plan to bring at least 2.5 liters of water per person. There aren’t natural water sources on this trek, so come prepared.
- Rain Shell Jacket: In March and April there’s a good chance of wet weather. Due to the distance of this hiking trail, it’s vital to keep yourself dry and prevent hypothermia.
- Food: Bring a snack or pack a lunch. Nutrition is critical if you get lost and spend the night on the trail.
- Flashlight: Getting lost is a risk when you are hiking especially in a deep forest. You might not imagine being out after dark. But it can happen, especially if you veer off the marked trail.
- Paper Topographic Map: Pick up an actual paper park map of the trails within the park boundary. Otherwise, there are smartphone apps that have adequate map options.
- Fully Charged Cell Phone. There isn’t great cell coverage in Virginia state parks. Keep the phone in airplane mode to limit battery use. Having a phone is important for emergencies. Most cell phones will connect to a tower, regardless of provider, to call 911. An operator can ping your phone and triangulate your location.
- Dog Leash: Pets can come on your hike but must be on a leash no longer than six feet at all times. This rule is to protect your pet from other dogs and wild animals you encounter.
Texas: Big Bend National Park
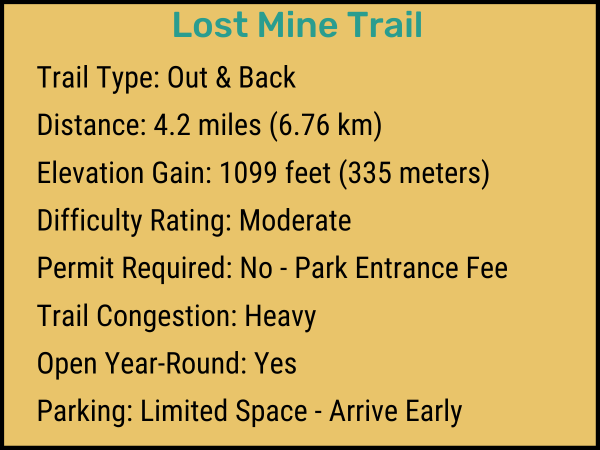
Lost Mine Trail
If you only have one day to visit Big Bend National Park, in Texas this is the hike to complete. The Lost Mine Trail isn’t a walk in the park, it’s a moderate, steep hike. You’ll travel 4.2 miles (6.76 km) and climb over 1,000 feet (304.8 m). So why is this the best way to spend your time in the park? It’s superior because the effort-reward ratio is extraordinary for one of the best spring hikes in America.
Want a shorter trip? No problem, halfway up this hike is a great viewpoint offering scenes of Casa Grande and the Juniper Canyon. Up top, you’ll view the Pine Canyon and Sierre del Carmen in Mexico.
The total distance for this heavily trafficked out-and-back trail is 4.2 miles (6.76 km) round trip. Bring the kids but keep the pooch at home, as dogs aren’t allowed. Keep your eyes peeled for black bears, mountain lions, or gray foxes along Chisos Mountains trails. Other species to see are Carmen Mountain white-tailed deer, and Mexican jay birds.
Keep in mind, that Big Bend National Park charges a fee to enter. The fees are $30 per vehicle or $25 per motorcycle. Or if you enter on foot, horse, or bike the fee is $15 per person. For locals or long-term visitors, you might prefer to buy a park-specific annual pass for $55.
- Pros: Huge reward after moderate effort. 2 different overlooks with amazing views. Beautiful wildflowers and wildlife viewing.
- Cons: Small limited parking lot. No dogs allowed. Limited protection from the sun. No natural water sources.
Traveling To The Trail Head:
There are many routes you can take to get to the Lost Mine trailhead. Whichever you choose know that distances between towns and services are considerable. Ensure you have plenty of gas, food, water, and supplies for the trip.
For example, driving from the North from Marathon Texas these are basic directions. Passing through the town center from the East take a right onto US-385 S (South). Drive for 39.8 miles (64.05 km), which turns into Main Park Road. Continue for 27.5 miles (44.26 km) until the end of the road.
At the junction for Panther Path turn right onto Gano Springs, on the left-hand side is your last chance for fuel. After 3 miles (4.83 km) you will see signs for Chiso Basin, turn left on Basin Junction. The trailhead is on your left side after about 5 miles (8.05 km).
Bear in mind, that the parking lot fills up fast, so it’s best to arrive early. If you are new to the park, pick up a trail tour brochure at the trailhead. Also make sure you bring lots of water and food due to the heat, high altitude and elevation gain.
Hiking the Lost Mine Trail:
The first section after the trailhead features a gentle slope upward. From your right, you’ll start to see magnificent views of Casa Grande Peak, a famous Texas mountain. At this point, hikers are on the opposite side of Casa Grande from the Chisos Mountain Lodge. Search for the waypoint marked “Lookout.” Here are many rock outcroppings to sit and enjoy your first view of Juniper Canyon. On a clear day, you might also see the South Rim off in the distance.
Passing the “Lookout” it gets much steeper, particularly as you reach the switchbacks. These switchbacks along the trail can be tiring for anyone. To combat tiredness, try concentrating on a large rock spire up ahead. It marks the point at which the switchbacks stop. While the climbing won’t be over, the steepness will lessen.
Once the switchbacks end, the trail continues up a gentle slope to what you might think is the peak. It’s not, this waypoint called “Alt Peak” marks the area where the trail travels along a ridge. The “Peak” waypoint is the actual location of the top or end of the trail. You’ll know you hit the top because of the abrupt upward rock face. Anyways, the top is big and open, great for exploring and having a picnic lunch before heading back down.
Prep List
- Full Gas Tank: Remember to either fill before you enter the park or right after you leave. Services are sparse in the areas surrounding Big Bend National Park.
- Hydration: You need plenty of water to complete this steep hiking trail. This hiking trail sees very hot temperatures from June onward. Plus the elevation will make even the most athletic hiker parched. A conservative estimate for water is 2 liters per person.
- Nutrition: Take some snacks or a picnic lunch to take in the views up top.
- Proper Footwear: Wearing supportive runners is fine, but trail-specific shoes or boots are better.
- Sun Protection: It’s Texas, the Lost Mine Trail is going to be hot and exposed. 12 pm to 4 pm tends to be calm and arid. So sunscreen, sunglasses and a hat are a must.
- Layers: In the morning it can be much cooler at the peak than at the trailhead. For early morning hiking layering clothing is best. Take a light jacket for any weather or temperature changes.
- A cell phone: Reception in Big Bend National Park is spotty at best. But take the cell phone anyway and set it to airplane mode to save your battery. In an emergency, it should allow you to call 911 regardless of your carrier.
Maine: Acadia National Park
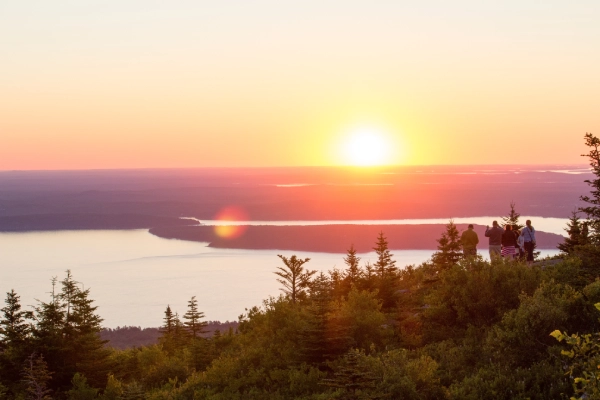
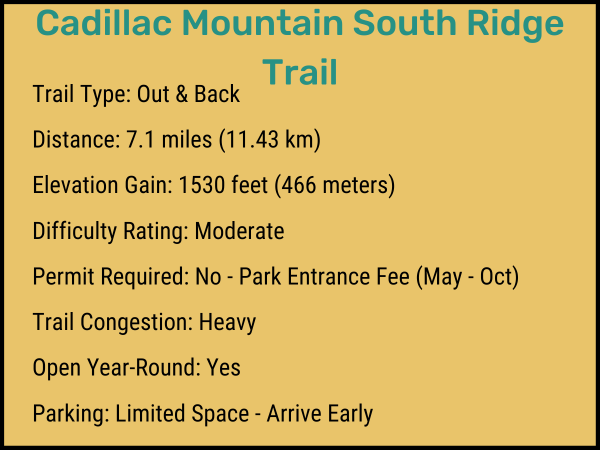
Cadillac Mountain South Ridge Trail
The Cadillac Mountain South Ridge Trail is a “there and back” trail in Acadia National Park, Maine. It’s my favorite moderate hiking trail for viewing the sunrise. The trail is 7.1 miles (11.43 km) round trip and is best attempted from late April to early June to beat the crowds. To experience the sunrise on Cadillac Mountain, hit the trail by 4:45 AM. This way you can take your time to enjoy the ascent and have plenty of time for the sun to rise.
This is the highest peak in Acadia National Park and the highest point on the East Coast of the United States. The total elevation of the summit is only about 1500 feet, but the steep sections will test your legs. About two-thirds of the trail is above the tree line, enabling you to see the route sprawl out ahead. Expect mud, exposed roots and loose granite on the trails in Spring.
To enter the Acadia National Park you will need to pay a fee. Expect to pay a fee of $30 per vehicle or $25 per motorcycle. Visitors entering on foot, horse, or bike will pay about $15 per person. Click here for information about current prices.
- Pros: Perfect sunrise views. A good test of your legs. Diverse Scenery Leashed dogs allowed. Family-friendly (note: one iron rung near the summit).
- Cons: Unexpected weather changes. Full exposure at the summit. Must carry water and food for the entire hike. The trail is hard for people with joint problems.
Directions To The Unmarked Trailhead
Follow the Park Loop Road for almost 3 miles (4.83 km) before turning left towards Sand Beach. Exit the Park Loop Road at Sieur de Monts to reach ME Route 3.
Continue following the ME 3 through Otter Creek. Right after you pass the Blackwoods Campground you can park on the shoulder of the road at a gravel pull-off. The trailhead will cut into the forest here. There is no road sign for the trailhead so keep an eye out for a well-worn trail.
What To Expect On The Trail:
From the trailhead, you dip into the pine and spruce woods for a mile. When you emerge from the trees the trail will steepen as it ascends the ridge. After the trees give away you will have the option to take a short loop trail to a rocky outlook known as Eagle Crag. While on Eagle Crag you will enjoy panoramic views of Otter Creek and the Atlantic Ocean.
Once you return to the main trail you will descend to a small glacial pond known as “The Featherbed.” Here there is a wooden bench for taking a break while gazing at the unique pond. In a short time, the trail will intersect the Canon Brook Trail. Be sure to take a quick look at the sign, and make sure you’re pointed in the right direction.
Beyond this trail junction, the trail is steep and rugged with exposed granite. This section of the hiking trail is above the treeline with striking views of the ocean and outlying islands. It’s here that the trail is the most challenging, due to a few short and steep sections. To trek this section you will grip iron rungs. Keep going on the trail for about 500 feet (152.4 m) before topping out on the summit of Cadillac Mountain.
Take a welcomed break at the top and take some photos. The summit provides expansive views of the Bar Harbor, ocean, and surrounding mountains. The views are what make this trail one of the best spring hikes in America, soak them in. Once you’ve had your fill, return to the start by retracing your steps back to the ME 3.
Sunrise Gear For The Best Spring Hikes
Since you will most likely be heading up to the summit for sunrise you should ensure you’re safe and warm. In addition to the 10 essentials, take the following items:
- Appropriate Footwear: I would wear hiking boots in Spring and trail runners in the Summer. This is because a large part of this trail is on exposed rock what you wear on your feet will differ between seasons. In spring, you need to maximize waterproofing and ankle support. While in summer you need to maximize traction, I recommend wearing a trail-specific runner.
- Comfortable Outerwear: In Spring a belay jacket is good and for Summer bring a windbreaker. As the trail consists of a rocky ridge next to the coastline you will want a belay jacket in Spring or at Sunrise. This is a light insulated soft shell jacket with a big hood. In the Summer wear a windbreaker.
- 4 Season Pants (Spring/Sunrise): Keeping your legs warm will help you stay energized to finish this hike. For a Sunrise hike, I like to layer with mid-weight merino tights.
- Hiking Poles: For hikers with joint or balance problems, these will help.
- Headlamp (Sunrise): Another great addition to the sunrise hike is good illumination. Try a hands-free option like a headlamp.
- Water: For a hike like this we take 2 Liters of water per person.
Finishing Up: Best Spring Hikes In America
As of now, you should be raring to go on your next adventure on any of the best spring hikes in America. The United States of America is an outdoor playground, one we must keep clean and beautiful. It’s vital to leave no trace while hiking. Hike out with all your trash and limit single-use plastic bottles. If you approach a dehydrated hiker, and you can spare some water help them out. Treating every hiker out there as a friend keeps everyone safe and happy.