If you already have a fishing rod and need to add a beginners fishing reel, this is the article for you. This part of a tackle set or “outfit” as it’s sometimes called can be overwhelming for novice anglers. Especially if you don’t have friends or family who fish. Don’t worry though, I’ve got you covered. Today you will learn everything you need to know to buy a fishing reel with confidence. Let’s get started.
What Is A Fishing Reel?
This mechanical device uses a rotating arm to release, collect and store fishing lines. They look confusing to an untrained eye but are quite simplistic in operation. Fishing reel choices are like rod choices, your choice depends on skill level, fish type and environment.
Before you learn about each type of reel, there is one more term you need to know.
Fishing Reel Drag System:
This mechanism allows you to set the amount of resistance a fish feels when it pulls on the fishing line. It’s a brake system like the one you have in a car. The tighter you set a drag, the more resistance the fish will feel. Make sure to set the drag at a setting that tires out the fish, but won’t snap the line. Now it’s time to learn about each fishing reel.
Types Of Fishing Reels & Steps To Use
In fishing, there are two main starter categories of reels; spinning reels and fly reels. Fly reels are special reels that you use only for fly-fishing, for ease of learning they aren’t included as beginners fishing reels.
For this guide, I focus on reels that use a typical spool mechanism. Modern anglers use one of three types: spin cast, spinning or baitcasting.
Spin Cast Reel:
This type of reel is the cheapest to buy; it has a closed face and sits on top of the reel. Enclosed under the nose cone of the reel are all the important parts. At the top of the nose cone is a little hole, this is where the line comes out of the cover. Since the reel is the easiest to use, it’s a perfect beginners fishing reel for young children.
Steps to use a spin cast reel:
- To start a cast you push down the button on the back of the reel.
- As you whip the rod forward, it releases the line out.
- To stop the line you let go of the button.
- Reel in the line by turning the handle
Since it’s simple to operate, you sacrifice a lot of distance and accuracy, but it’s a fun reel for the kids.
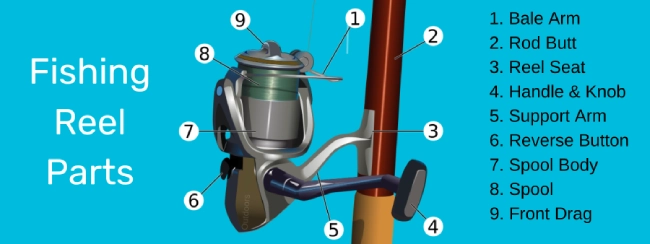
Spinning Reel:
Spinning reels are the most popular type of fishing reel. This is because it’s versatile and more accurate than the spin cast. Plus, it’s easier to operate than the bait-cast reel. The spinning reel has an open-face design with the spool of the fishing line visible. Like most other reels, as you turn the handle, the spool of the spinning reel rotates. Unlike the other types of reels, a spinning reel attaches beneath the rod when in use.
Since it is open-faced, you see the fishing line throughout the reel. A spinning reel performs best for fishing lines under twenty-pound weight. The way the fishing line travels from the reel to the end of the rod is as follows.
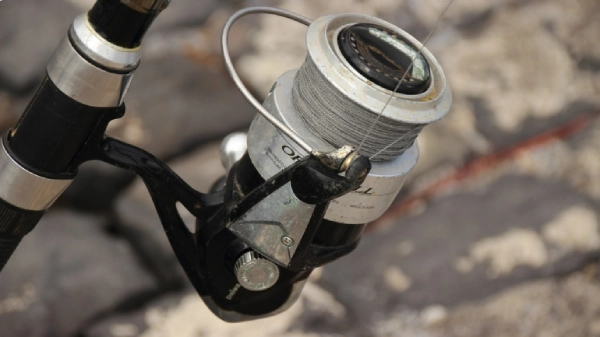
From the spool, the line passes over a small wheel called a “power roller” before continuing up through the rod guides. You will also see a metal arm called a “bail” on the reel. The bail keeps the fishing line in place and makes sure that it passes over the power roller. These components are important for the function of casting and retrieval.
Steps to use a spinning reel:
- First, hold the reel in your stronger hand. Your hand should be in the middle of the reel foot. With the reel below the handle, set the drag. With your other hand, pull out some line until there is 6 inches (15.24 cm) beyond the tiptop of the rod.
- Second, turn the handle until the power roller spins to be underneath your index finger. To keep the line taught place your index finger on the line and hold it firm while you prepare to cast.
- Third, move the bail arm into the up position, known as “opening the bail.” Opening the bail frees the line and allows it to un-spool. Keep the line firm while you back-swing the rod. At the end of your backswing allow the rod to flex; this is the action. The action will load the rod for the cast. Next using your wrist and elbow push the rod forward toward the area you are targeting.
- Fourth, this step is all about practice and timing. As the tip of your rod passes the visual halfway point to your target, release your index finger. This releases the line and completes the cast by sending the lure out to your target area.
- Fifth, close the metal “bail.” At the time you feel a nibble on the rod, turn the reel handle to pull the expelled line back to you.
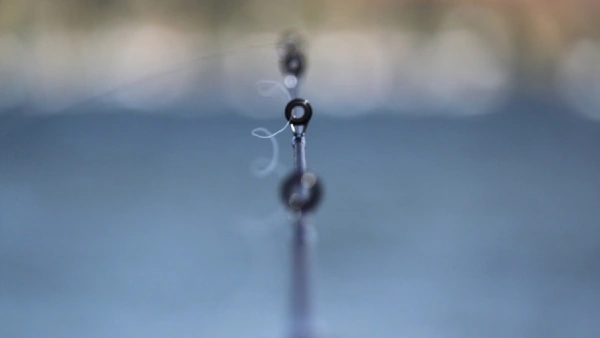
Note: The most common problem for beginner anglers when using a spinning reel is a twisted line. Here’s how to fix it: open the metal bail and by hand un-spool many yards of line. Keep un-spooling until the line lies flat, as it does close the bail. Finish up by slowly rewinding the handle to reel in the line.
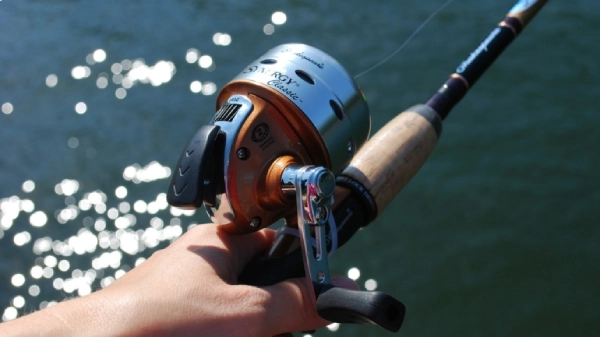
Baitcasting Reel:
This style of reel is very different from the other reels in several important ways. One difference is that it has a revolving spool and sits on top of a rod with a trigger handle. For a beginner angler, this type of reel is the most difficult to master.
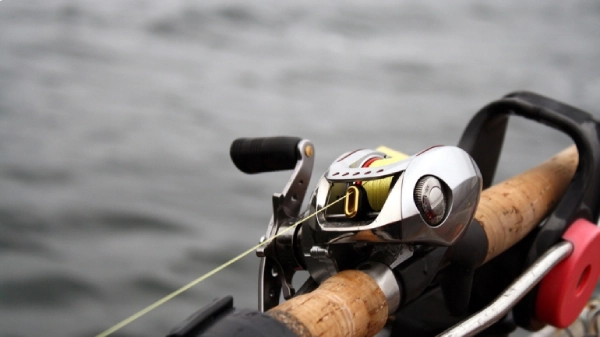
Baitcasting Versus Spinning Reels
The big difference between this reel and a classic spinning reel is the way an angler “opens” the spool. A baitcasting reel relies on you pressing a thumb bar to release the spool. With this reel, the heavy weight of a lure pulls the line out as you cast. Whereas a spinning reel uses the metal bail to open the spool and release your index finger on the line to finish a cast.
A baitcasting reel needs more education about proper reel adjustments to be successful. As well, you need to use a lot of skill to ensure it stops spinning when the lure hits the water. The two main components that make this reel great for some but difficult for beginners are the following:
- First is the tension knob. This will apply tension to the spool either to allow the spool to spin or to restrict it from spinning. You would complete this before attempting a cast.
- The second which adds to the learning curve for a beginner, is the braking system or drag. This system adjusts and slows down the spinning of the spool during the cast. Without this brake control, a backlash can happen.
Steps to use a baitcasting reel
The steps below look easy, but this reel needs intense finesse to get it right. Before you cast you will want to set the drag system and choose your bait or lure.
- To start you will turn the fishing rod/reel on its side. Next, engage the thumb bar with the base of your thumb to open the spool. Ensure the tip of your thumb rests against the line on the spool, to keep the lure in position.
- Performing a cast, you will snap the rod backward at a 2 o’clock position.
- Next, pitch the rod forward in a fluid motion. Ensuring your thumb is grazing the line as the lure pulls the line out of the reel. You use thumb contact on the line to moderate the revolutions of the spool. Another use of your thumb is to brake the lure as it reaches the desired distance, finishing the cast.
- At first nibble, you will turn the handle of the reel
One confusing feature for novices is the centrifugal braking systems. These help control the backlash of fishing line. Backlash is a tangled mess of line that results if the fishing line doesn’t stop spooling after a cast.
Note: Experienced anglers enjoy the precision and accuracy of these reels, but they aren’t great for beginners.
Fishing Line Explained:
A fishing line is a cord-like length of material that attaches to the reel and terminates with some kind of hook or lure. It’s the physical link between you and the fish you are targeting. This is the reason that choosing the right type of line is vital for success. Lines choices are plenty, from braided nylon, monofilament, and special catfish lines, to fly lines.
For this beginners fishing reel guide, I’m going to stick with a monofilament fishing line. Monofilament is the most common type of line and comes in a variety of colors.
4 Considerations For Choosing Fishing Line
1. Strength:
Called test weight, line weight or pound test, these all mean the same thing. It’s the amount of weight a line can support before it snaps/breaks. Line strength can vary from 4, 6, 8, and 10 to over 20 pounds. Different types of line strengths will catch different types of fish – notice a pattern to rods and reels.
The higher the number listed on the package of the line, the stronger it is. Listed as either kilograms or pounds depending on your location. To add to your confusion, some state, “test” or have a # above or next to the marking. Like #20 or 10 kg (20lbs)
2. Visibility (Color):
Visibility relates to the fishing line being visible to the angler, not the fish. A box of line either has a label noting a color or it will state high visibility, low visibility, or invisible.
3. Fishing Line Size:
This is the actual diameter of the fishing line. Find the sizes on the box stated from thousandths of an inch or hundreds of millimeters.
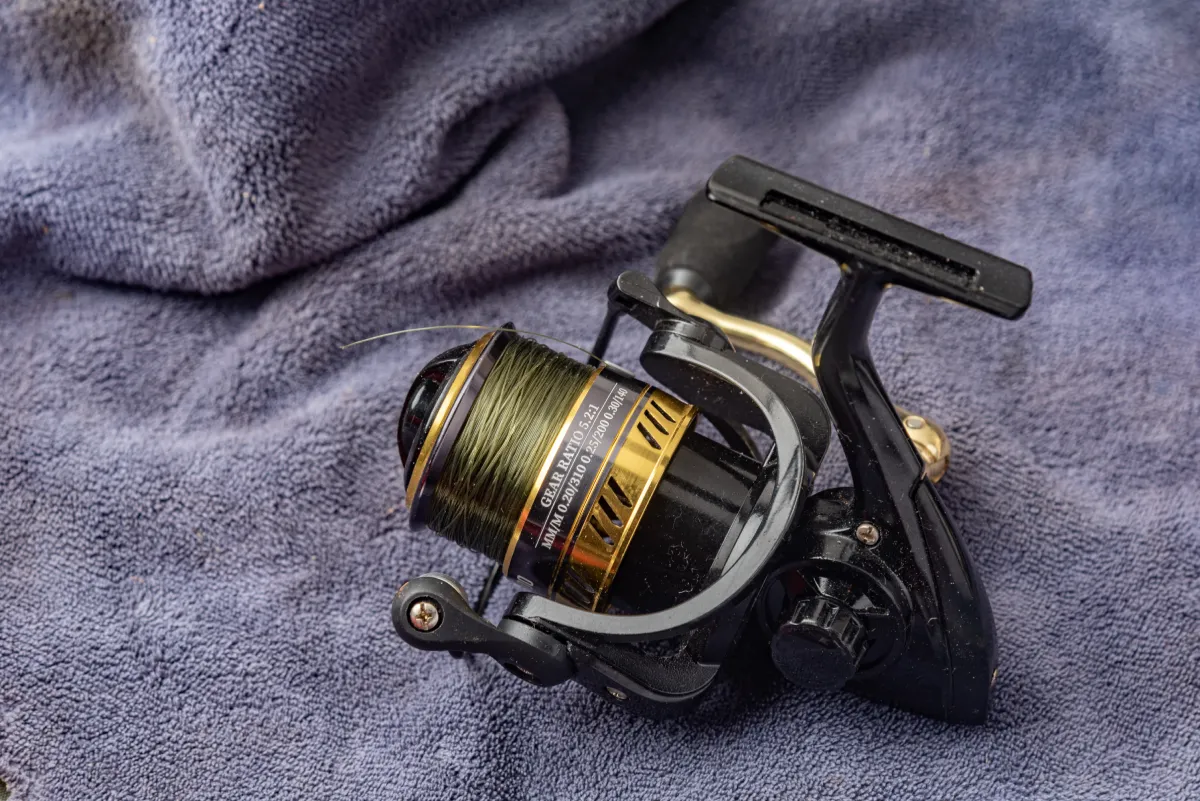
4. Reel Specifications (line length/strength):
Check out the reel mounted on your rod. Most reels will have a series of numbers printed on them, like 260/6, 190/8, 130/10. The numbers show the following:
260 = The amount of line (length in yards or meters) the reel can spool.
6 = For that particular strength of the line.
After examining your reel, you can see what fishing line combinations it can handle. Okay, we have sorted out the fishing rod, reel and fishing line, it’s time to talk terminal tackle.
What Is Terminal Tackle?
Terminal tackle is the general name for the gear attached at the end of your fishing rod. These include the hook, weights, swivels, floats, and lures that attach to the end of your fishing line. Below is an explanation of each type.
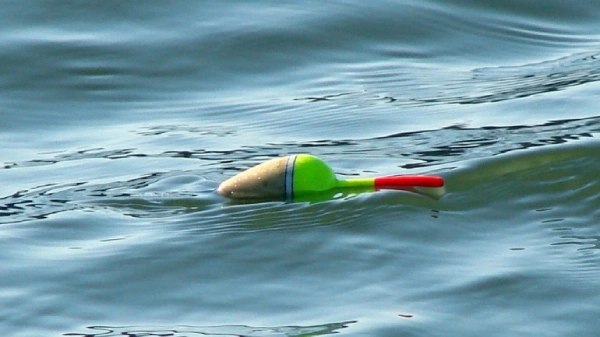
Floats:
Also known as “bobbers.” They’re made of either hollow plastic, balsa wood or Styrofoam. Floats suspend the bait or lure away from the bottom of the water. Try to use the smallest float you can to cut the weight of the bait or lure. It’s ideal to have an upright float, to do this, you can use a sinker.
Sinkers:
These are weights that you attach to the line, which also aid you in longer casts and sink your bait or lure. In the past, they contained poisonous lead. Today they also come in earth-friendly materials like tin or tungsten. A caveat of these new materials is that they are more expensive.
Leader:
This is a short piece of fishing line that you attach between your main fishing line and the hook or lure. A good choice for a leader is less than half of the strength (pound test) of your main line. Its function is to snap off in the event of a snag or a strong fish. By snapping a small leader line you keep the more expensive main line intact.
Swivels:
This joins your main line (heavier) to your leader (lighter). It keeps your line from twisting because it allows the leader to turn independently of the main line. The three most common types are as follows.
- Ball-bearing barrel swivel: A closed loop on either end of a barrel.
- Snap swivel: This is a quick-release snap opening on one end and a closed loop on the other. The snap is great for changing out lures, however, the extra hardware may frighten off fish.
- Three-way swivel: This is a specialty swivel for making rigs. With a three-way, you can have two leaders on one main line.
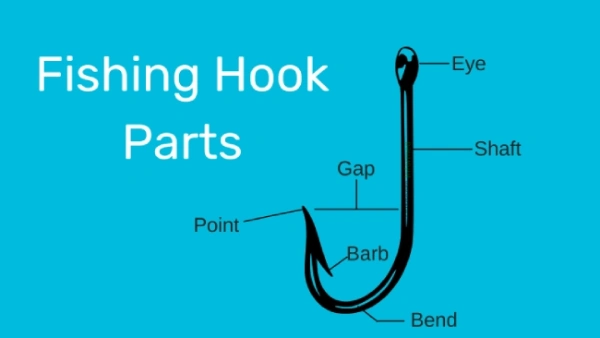
Hooks:
These are curved pieces of wire with a sharp “barb” and a point on one end. The barb is what hooks into the fish. At the top, there is a round eye for attachment of the fishing line. They come in many shapes and sizes, each designed with different uses.
Let’s move on from terminal tackle and move on to fishing with baits and lures.
Using Baits For Fishing
What are baits? Baits are any live food or artificial substance used to attract the fish and tempt them to bite. Bait falls into two categories either live baits or prepared baits. Below are some examples of each type and typical ways to hook each.
Live baits:
Worms:
These come in a variety of choices, like earthworms, red worms and night crawlers. If you buy worms from the store, they usually come in a Styrofoam container. You should store it in the refrigerator when not fishing.
Hooking: Ensure to loop the worm through the hook 2-4 times with some (less than 1 inch or 2.54 cm) of the worm dangling. More than an inch of worm dangling will allow a fish to nibble the worm without biting the hook.
Grasshoppers:
These are excellent bait for heavier fish like bass and catfish. Buy them from most local bait and tackle shops.
Hooking: To bait a hook with a grasshopper; ensure to insert the hook behind the grasshopper’s head.
Minnows:
These are a general term used by anglers to mean any small bait fish. Bait fish are usually shiners, chubs and dace or minnows.
Hooking: Insert the hook through the lips or under their dorsal fin. Avoid hooking too low through the backbone if hooking under their dorsal fin. This is because the minnow will bleed out and die. Dead bait is not as effective in attracting fish.
Prepared Baits:
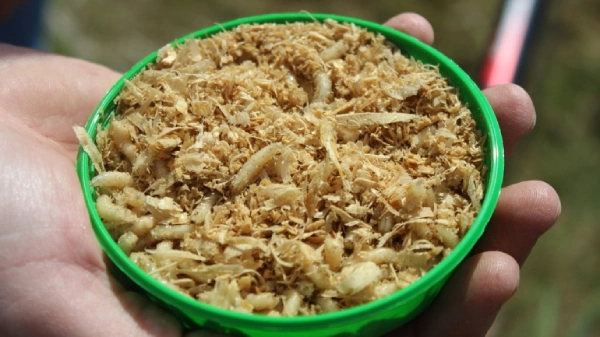
Power Bait (aka PB)
You can buy this very common dough bait in most bait shops or fishing retailers. Dough bait is a scented putty-like substance that comes in small glass jars. Anglers use it for targeting trout, carp or catfish. Since it is artificial, manufacturers will make it in a variety of colors. They do this to help attract the fish depending on the time of day and water clarity.
If you choose this type of bait, it’s a good idea to have at least a few jars of different colors. Most people agree that buying bright green and rainbow colors is great for beginners.
Hooking Power Bait: For PB anglers would usually use a small treble hook with this type of bait. As a beginner though, a single hook is cheaper to buy and easier to use. Especially if you fish in areas that require you to catch and release because it’s easier to release the fish. To hook this bait, mold a piece of the bait around the hook.
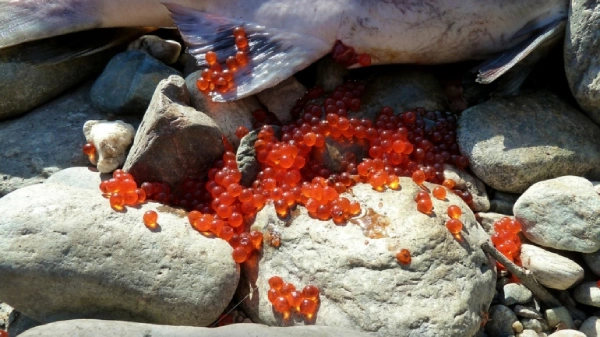
Salmon eggs
These are available in two ways; you can either buy real preserved eggs or buy imitation eggs (Power Eggs). Power eggs come in different flavors and colors. What you choose will depend on your comfort with salmon eggs.
Hooking Salmon Eggs: Use a single hook and thread a single egg through the point and barb. Being gentle, pull and twist the egg back into the barb to secure the egg. If you prefer to use a treble hook, you can do this same method on each hook barb.
Fishing With Lures
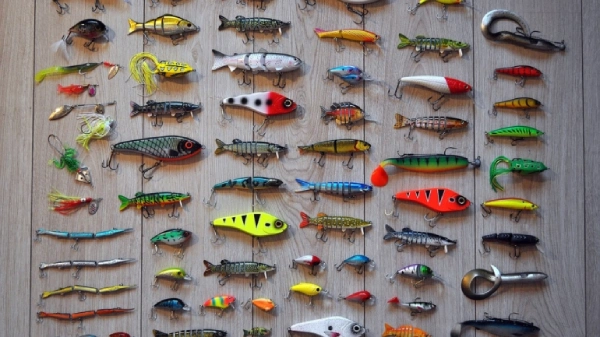
Lures are like man-made baits except they use movement, vibration, flash and color to lure fish. Lures do tend to be more expensive to buy than live or prepared baits. Plus they are more prone to snags and snaps if entangled with obstacles. While losing lures can be a pain, they are very effective in getting certain types of fish to bite.
Before we discuss lures, it is a good idea to know what lure “presentation” is. In fishing lingo, lure presentation is the actual technique used to catch the fish.
Plugs:
In the past, made of carved wood, plugs are these days made of many materials including plastic and cork. Plugs resemble bait fish, frogs or other marine prey and have two or three treble hooks. Depending on the design, a plug can float, dive or do both.
- Floating plugs include stick baits, prop baits, and crawlers.
- Diving plugs include crankbaits, minnow plugs, trolling plugs and jerk baits.
Depending on which type you choose, plugs are available in a variety of sizes. They can wobble, rattle or gurgle when moving to aid in attracting fish.
Plug Lure Presentation:
A great option for beginners is the minnow plug; make sure to add a split ring to its eye. A minnow plug is long and narrow, about four inches in length. After you cast, this plug will float at the start, then dive and sit right below the surface of the water. Watch for the rings on the surface of the water to disappear. Next, choose to either reel it in slow or fast. While reeling in ensure to twitch the rod and make intermittent stops to activate the lure. This will help attract the fish to bite.

Spinners:
This type of lure is awesome for beginners since they are simple to use. A spinner is a metal shaft with a spinning blade. You can leave the hook bare or dress it with bait. Reeling in a spinner through water will cause the blade to spin. This spinning motion creates sound and vibration that attracts the fish to the lure. In addition, if you fish in murky water spinners are a great choice.
Spinner Lure Presentation:
It’s simple, you just cast and retrieve, because that is all it takes. As you start reeling in the blade begins spinning and working to attract fish.
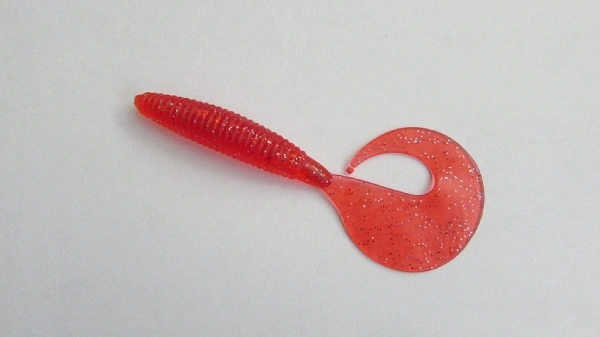
Soft Plastics:
These are flexible lures made by pouring liquid plastic into a mold. Then they add dyes, metallic flakes, and sometimes scents. These molds are in shapes of what fish eat like worms, grubs, lizards, crayfish and minnows. There are also shapes unlike any found in or out of water, known as “critter baits.” The purpose of the soft plastic bodies of these lures is to encourage the fish to hold on to them a little longer. This helps give the angler a greater chance to hook the fish.
Soft Plastics Lure Presentation: Texas Rig
Lure presentation with soft plastic baits will depend on the shape of the bait. The most common soft plastic bait shape is a worm and an easy technique is the “Texas Rig.”
Use a bullet sinker weight, first thread and secure it to the leader line. Next, insert the hook point into the head of the worm, about 1/4 inch (6.35 mm) from the end. Next, rotate the hook out of the bottom of the worm. Now push the hook point and barb through the mid-section of the worm, so the bait lays parallel to the hook shaft. This makes the worm “weedless” which means it will not snag on underwater foliage.
Once rigged, you can direct your cast to the desired area. Let the rigged hook disappear underwater and fall to the bottom. Then twitch the tip of your rod a few times until you feel a bite. Sometimes this action might not be enough, so try to tug the rod back to imitate light twitchy hopbacks.
Jigs:
A jig lure is a weighted metal or lead head with a body and tail. The tail is either made of feathers, soft plastics, animal hair or a chosen bait. They come in infinite sizes, colors and patterns. Jigs are the most versatile type of lure plus they’re budget-friendly
Jig Lure Presentation:
Using a jig lure is all about concentration and practice. Unlike other types of lures which move based on their design, for jigs, it’s all about your movement. Doing nothing after you cast means the jig stays motionless and sinks to the bottom. You will know it has hit bottom when the main line goes slack.
So, cast out and let the jig sink to the bottom. Next, you will begin a hopping-in reel action. To do this start by jerking up and lifting the rod tip, then lowering it, while also reeling in your line. Attempt big hops and little hops, or twitching while reeling in. As said before, you need to practice this until you find what works for you. Detecting a fish bite is the toughest aspect of jig lure fishing.
Spoons:

These are metal curved lures shaped like a spoon. To attract fish, you move the lure to cause a side-to-side wobble which resembles an injured bait fish. Nature is unfortunately cruel and most fish (bass) love to hunt injured bait fish. Spoon lures come in a variety of shapes and sizes, so there is a lure for every fishing situation.
Spoon Lure Presentation:
Using spoon lures will depend on what technique you choose to use. Some spoon lures are casting types, others are good for trolling, and some you can use for jigging.
For beginners, I recommend sticking with a casting spoon. Casting spoons, or spinner lures, use a simple cast and retrieve movement. As long as the lure is wobbling you can increase or decrease speed. However, if the spoon begins to spin, then slow down your reeling in.
Finishing Up Beginners Fishing Reel Basics:
Now you will have all the information to pick a beginners fishing reel, as well how to advance in your hobby. Remember to pay attention to the reel system including the fishing line and bait/lures. Doing so will help you have more success in catching the fish you are targeting.